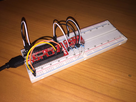
I'm using two I2C component at the same time and it works very well.
I just went through the three pages of posts here and i feel that it's super cmplex compare to what i've done.
My setup is:
- A random ESP32 (https://www.aliexpress.com/item/ESP-32- ... 0.0.9sgS9i)
- A I2C Oled display 128x64px (random as well) (https://www.aliexpress.com/item/0-96-I2 ... 0.0.9sgS9i)
- An AM2320 humidity and temp I2C component(https://www.aliexpress.com/item/AM2320- ... 0.0.9sgS9i)
And that's all.
First, I've connecte the SDA and SCL of BOTH I2C components to the pins 11 and 14 (on my board it's the D21 and D22) (https://raw.githubusercontent.com/playe ... vkitv1.png).
Yes, both of them.
Then I've ran the Arduino Example i2c_scanner programme. It has detected only one I2C component, my Oled disply and it gave me its HEX address (0x3C). I used this address just to configure a variable linked to my Oled display. In fact, the AM2320 doesnt have any I2C address but it works.
Then i've used the following code:
Code: Select all
#include <SPI.h>
#include <Wire.h>
#include <Adafruit_SSD1306.h>
#include <AM2320.h>
AM2320 th;
#include <WiFi.h>
#include "time.h"

// Wifi
const char* ssid     = "********";
const char* password = "********";

// Oled
#define OLED_RESET 4
Adafruit_SSD1306 display(OLED_RESET);

#if (SSD1306_LCDHEIGHT != 64)
#error("Height incorrect, please fix Adafruit_SSD1306.h!");
#endif

// Time
const char* ntpServer = "pool.ntp.org";
const long  gmtOffset_sec = 3600;
const int   daylightOffset_sec = 3600;


void printLocalTime()
{
  struct tm timeinfo;

  if(!getLocalTime(&timeinfo)){
    display.println("Failed to obtain time");
    return;
  }
//  delay(1000);
  display.println(&timeinfo, "%Y-%b-%d %H:%M:%S");
}


//================
void setup()   {
  Serial.begin(115200);

  // by default, we'll generate the high voltage from the 3.3v line internally! (neat!)
  display.begin(SSD1306_SWITCHCAPVCC, 0x3C);  // initialize with the I2C addr 0x3D (for the 128x64)
  // init done

  // Clear the buffer.
  display.clearDisplay();

  // draw a single pixel
  //display.drawPixel(10, 10, WHITE);
  // Show the display buffer on the hardware.
  // NOTE: You _must_ call display after making any drawing commands
  // to make them visible on the display hardware!
  display.display();
  delay(1000);
//  display.clearDisplay();

  // text display tests
  display.setTextSize(1);
  display.setTextColor(WHITE);
  display.setCursor(0,0);
  display.println("Wifi init...");
  display.display();
  display.println("Connecting to ");
  display.print(ssid);
  delay(1000);

  // We start by connecting to a WiFi network

  WiFi.begin(ssid, password);

  while (WiFi.status() != WL_CONNECTED) {
      delay(500);
      display.print(".");
      display.display();
    }

  // display.clearDisplay();
  // display.setCursor(0,0);

  display.println("OK!!");
  display.print("WiFi: ");
  display.println(ssid);
  display.print("IP: ");
  display.println(WiFi.localIP());
  display.display();

  //init and get the time
  configTime(gmtOffset_sec, daylightOffset_sec, ntpServer);
  printLocalTime();

  //disconnect WiFi as it's no longer needed
  WiFi.disconnect(true);
  WiFi.mode(WIFI_OFF);

  delay(2000);

  display.println("Wifi now disconnected");
  display.display();

  delay(5000);


}


void loop() {
  // Init display
  delay(1000);
  display.clearDisplay();
  // text display tests
  display.setTextSize(1);
  display.setTextColor(WHITE);
  display.setCursor(0,0);
  printLocalTime();
  switch(th.Read()) {
    case 2:
      display.println("CRC failed");
      break;
    case 1:
      display.println("CRC failed");
      break;
    case 0:
      display.print("Humidity: ");
      display.print(th.h);
      display.println("%");
      display.print("Temperature:");
      display.print(th.t);
      display.println("*C");
      break;
  }
  display.display();
}Basically, it inits the display, opens the wifi connection (You need to place you SSID and PSW instead of the ****), get the time from an internet server, then close the connection.
Then, starts the loop() in which it gets the temperature, humidity and the time and displays all that on the Oled display.
The Oled and the AM2320 are both I2C and connected to the same two SDA and SLC wires.
Let me know if it helps.
TBH

